Blending Modes
An example of usage
You can apply blending modes to template layers, including a user photo.
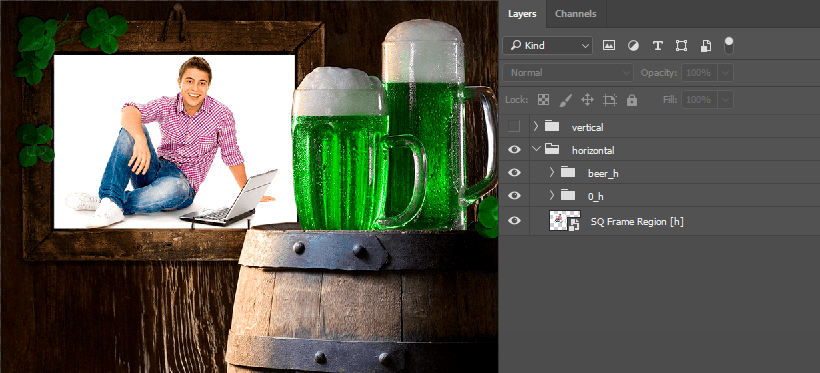
Let’s look at a basic template with a rectangular frame region. We’ve already placed a test photo into the smart object. As you can see, it does not go well together with the scenery of the template. Let us give it a bit of a retro look with the help of new layers with blending modes.
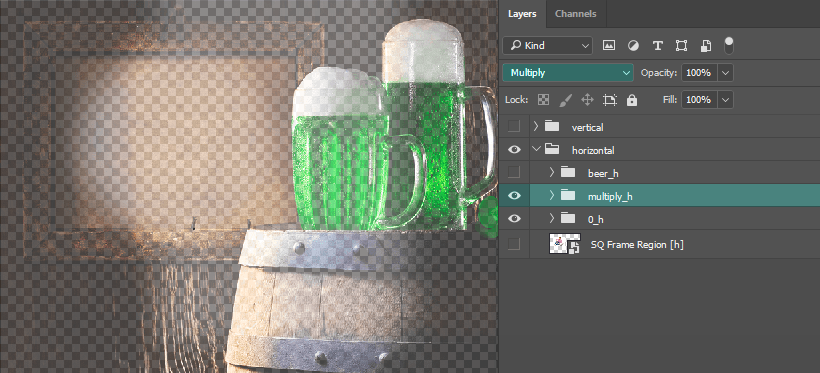
Create a semi-transparent layer (just make a copy of the layer with the interior scene), create a subgroup named ‘multiply_h’ with that layer and apply the Multiply blending mode to it. In this particular case we are only interested in the area inside the frame, so you can erase the rest of the layer.
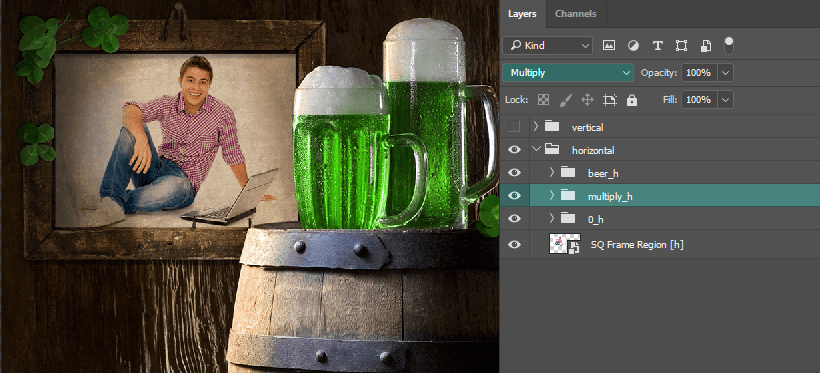
Now the photo looks aged.
Let’s try to make the photo look even more realistic.
The Multiply blending mode often makes some areas of a photo look too dark. To make them lighter, create a new semi-transparent layer with the interior scene and apply the Lighten mode to it.
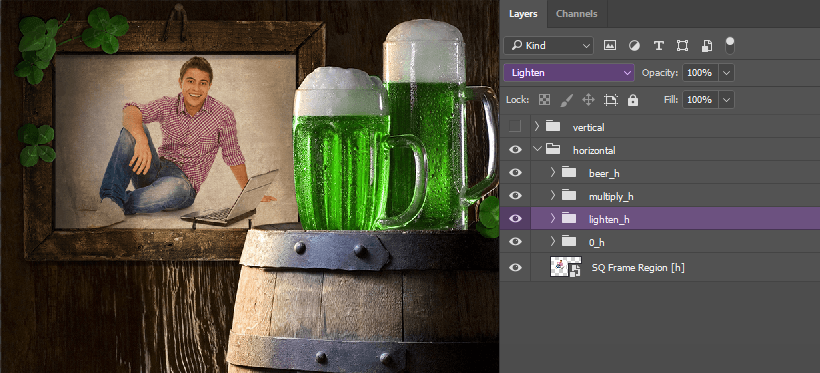
Finally the test photo looks realistic and is in complete harmony with the interior scene and the lighting.
Supported blending modes list
The blendings are identical to those in Photoshop:
- normal
- darken
- multiply
- color_burn
- linear_burn
- lighten
- screen
- color_dodge
- linear_dodge
- overlay
- soft_light
- hard_light
- vivid_light
- linear_light
- pin_light
- hard_mix
- difference
- exclusion
- hue
- saturation
- color
- luminosity
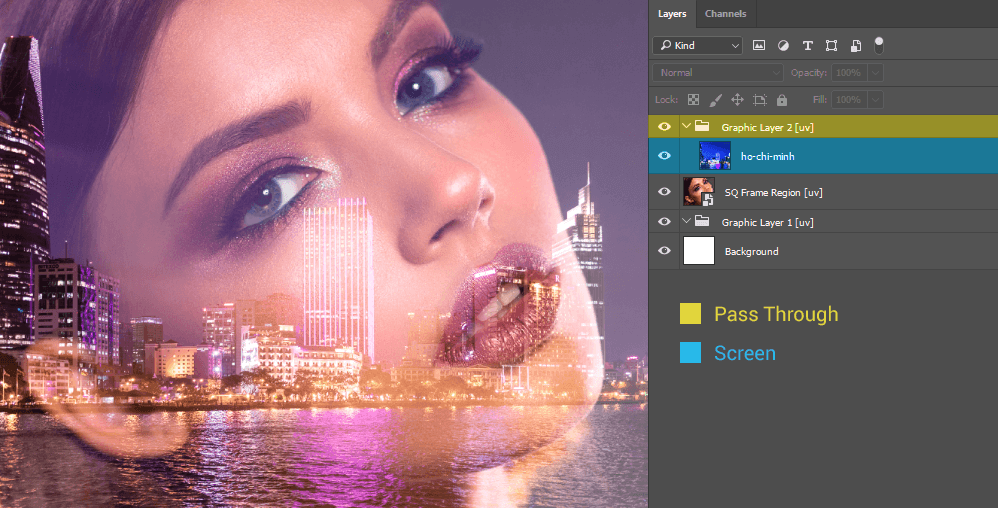
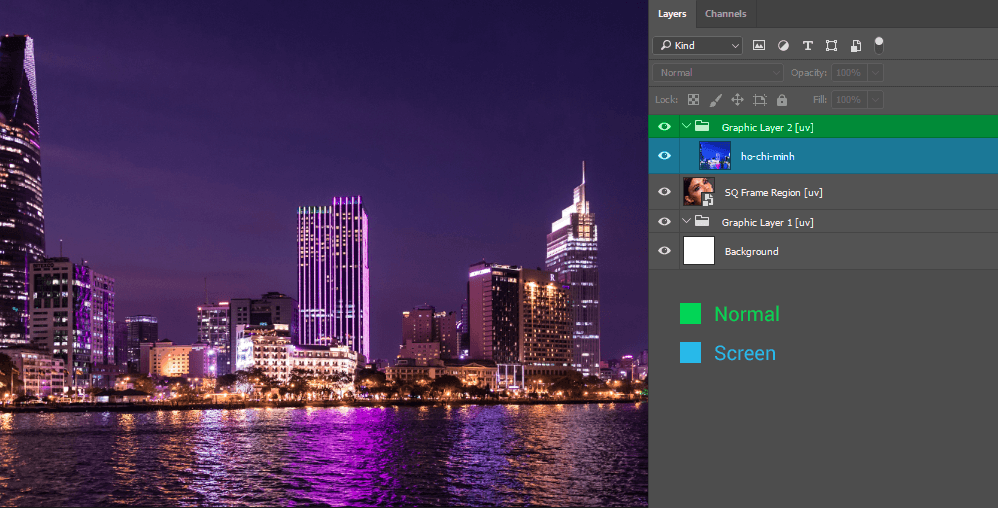
The difference between Pass Through and Normal blending modes
Even experienced users of Photoshop sometimes don't know the difference between the Pass Through and Normal blending modes, as they seemingly work in a similar way. Have a look at this example to see the difference between these two blending modes:
|
|
| The Pass Through blending mode applied to the top group of layers | The Normal blending mode applied to the top group of layers |
The Pass Through blending mode indicates that no blending mode is specified for a group of layers. Thus all graphic layers within a group with this blend mode behave as if they were part of a regular layer stack and not part of the group (the blending is performed in the usual order as if there is no group).
Blending modes other than Pass Through change the order in which the layers are processed. All layers within the group are put together first; then the resulting composite is blended with the layers below using the blend mode selected for the group.
E.g. the Normal blending mode changes the order in which the layers are processed. It first merges the layers in the group, calculating blending modes inside it, and only then the group is blended with the layers below it.
The Template Creator always parses a PSD document using a standard algorithm: the contents of subgroups of top level layers are rasterized on the level of these groups. In this way, the Template Creator cannot behave in the same way as the Pass Through blending mode, thus the results of processing will be different from those in Photoshop.
To avoid this mismatch (when you see different results in your PSD document and while processing test photos with a template), the Template Сreator generates presets with subgroups of layers that have the Normal blending mode. Later you can change this mode to any supported blending mode, other than Pass Through. If you specify the Pass Through blending mode, you will see a warning suggesting that the blending mode of this group of layers will be changed automatically.
Restriction for using the Pass Through blending mode applies only to the top level groups / subgroups of graphic layers which are rasterized to graphic layers on the template level. This rule does not apply to subgroups with deeper level of nesting.
If you still have questions regarding blending modes, learn the ‘Specify a blending mode for a layer or group’ section on the Adobe website.